Spring is a time of renewal. Painting is one of the easiest things you can do to transform your space, but before you get started, you should know how to properly prep the area.
Spring is a time of renewal. It’s a time to deep clean your home, take unused clothing to the charity shop, and tidy up your lawn. It’s also a great time to redecorate and give your place a facelift. Painting is one of the easiest things you can do to transform your space, but before you get started, you should know how to properly prep the area. Failing to prep can cause bigger problems later, so it’s worth it to take the extra time to ensure that the job is done right.
Prep Steps
- Clear everything out of the room you’re painting. Bigger pieces that can’t be taken out of the room can be moved to the center—just remember to cover them with drop cloths. We also recommend covering the floor with drop cloths, too—you can’t be too safe.
- Remove outlets, switch plates and vents. If your vents are in the floor, tape over them.
- Identify any lumps, bumps and cracks. Use painter’s putty or spackle, like DAP’s Alex Flex Spackling, to repair minor cracks and dents and sand down any bumps. Paintable acrylic latex caulk is great for filling in cracks, too; try DAP’s Alex Flex Premium Moulding & Trim Sealant.
- Lightly sand the walls. This will feather out chipped paint and provide a good base for new coats of paint.
- Wash the walls with a mild cleaner to get rid of any sanding residue. You should always avoid painting over dust. If your walls are smoke stained, use a 50/50 solution of bleach and water.
Taping and Priming
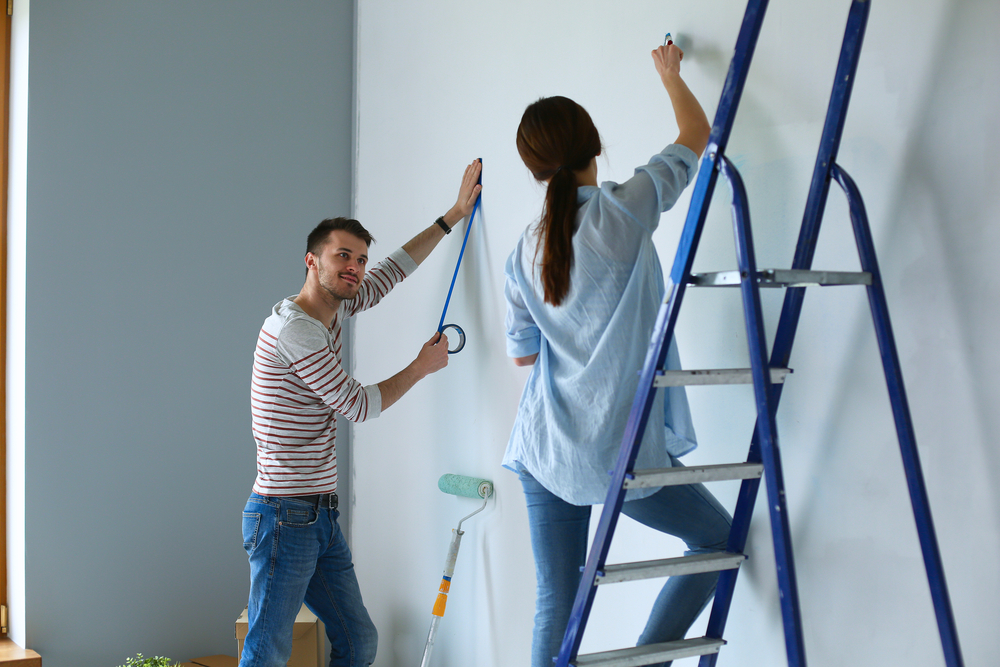
According to This Old House, experts are divided when it comes to taping. Some say that paint can bleed behind the tape, while others say that removing tape can remove the skin that most latex paints form. But tape is still the best way to get perfectly straight lines. If you do decide to use tape, the experts all recommend blue painter’s tape instead of masking tape, because it is easier to remove.
Before you start painting, you should always prime the walls. Many paints contain their own built-in primers, but any contractor will tell you that you need to use a separate primer on your walls. Rich colors like dark red take several coats of paint to cover, and a primer will help you get there. They are formulated to give you an even base and help topcoats go on smoothly.
Choosing the Right Paint and Supplies
Don’t cheap out when it comes to paint, brushes and rollers. Inexpensive tools will do a sub-par job, no matter how skilled you might be at painting a room. And Popular Mechanics says that expensive, high-quality paint will go on easy and provide the best coverage. This Old House adds that flat paints are good for ceilings and formal rooms, but that glossier paints are more stain-resistant and easier to clean. Experts also say that paint additives like Floetrol and Penetrol make it easier to spread paint over surfaces.
Painting Tips
Wash roller covers before their first use with warm water and a little bit of liquid soap. This helps to get rid of any extra fuzz that might stick to your walls. If you’re done for the day but you still have more painting to do, soak the roller in paint and cover it with a plastic bag. Keep it as tight as you can so that it doesn’t dry out.
Start with the trim, then paint the ceiling, and end with the walls. That’s because it’s easier to tape off the trim than it is to tape off the walls. And painting ceilings can be messy; by doing the ceiling first, you can rest assured that you can cover any accidental nudges or drops of paint on the walls later.
Avoid lap marks (stripes of paint caused by uneven layers) by rolling the full height of the wall and keeping a wet edge on your roller. Family Handyman suggests starting near a corner and rolling up and down the full height of the wall, moving over a little bit with each stroke. Don’t let the roller dry out; if you find yourself applying more pressure, it’s time to get more paint on the roller. Both This Old House and Family Handyman recommend mixing several cans of paint in a larger bucket. The reasoning? Paint color can vary slightly and if you need to open a new can in the middle of a wall, the difference might be noticeable.
If you do choose to use painter’s tape, wait to remove it until the paint is dry. Family Handyman recommends cutting the tape loose before pulling it off; cutting it first will prevent pieces of dried paint from coming off the wall. Once you’ve cut it, you’re ready to pull the tape off in a 45-degree angle.
Once you think you’re finished, take a bright light to your walls and look for any spots you might have missed. It’s easy to do—even the pros miss a spot here and there. It’s easiest to fix these while you still have all your paint and supplies at the ready, rather than when you’re moving furniture back into place.
Whether you’re a seasoned pro or a home improvement novice, just remember the three P’s: patch, prime and paint. Always patch dents, cracks and nail pops; use a primer on your walls; and paint using the tips above. With a little patience and know-how, your home’s new paint job will look polished and professional.