There’s no time like the present to start a project around the house, whether it’s hanging pictures, replacing the kitchen faucet or updating your bathroom.
It should go without saying that it’s important to give your bathroom a good scrubbing on a regular basis. But it’s also important to do routine maintenance to ensure you’re avoiding issues like water damage and mold.
One easy way to prevent minor disasters is to take a look at the caulk sealing around your bathtub. According to hunker.com, in a brand-new home you’ll probably want to recaulk your bathtub after a year, due to your house settling. After that, tubs and showers should be re-caulked every five years — unless, of course, you notice the caulk starting to crack, chip or peel away from the tub. Even the smallest crack can let in water and over time, cause damage or mold.
So, how do you go about resealing your tub and keeping it in tip-top shape?
Removing old caulk
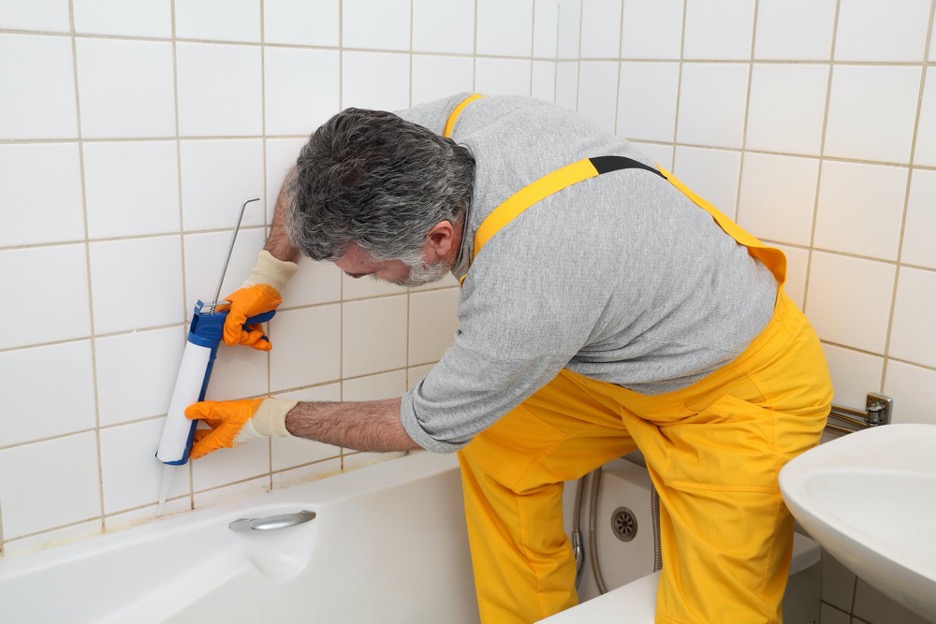
Before you break out the caulking gun, scrub the bathtub to remove soap scum and other residue. Then you’ll need to strip away the old sealant so that the new stuff has a good foundation. Follow these steps to remove old caulk:
- Soften the caulk by using a commercial remover, which will break down its structure and make it easier to pull away.
- Strip the caulk by slicing through it with a knife. If your tub has acrylic or latex-based caulk, commercial caulk removers will help to loosen it.
- Remove residue from the old caulk using a powerful cleaner. You can also use a razor blade to scrape off residue — just be sure not to scratch the surface underneath.
- Clean the surface again and let it dry completely. This will ensure that the new caulk goes on and stays on.
Caulking the tub
Once you’ve stripped away the old caulk and thoroughly cleaned the surface, you’re ready to start caulking. Before you get started, make sure you have gloves on hand and that the area is well ventilated. The more precautions you take now, the better off you’ll be in the long run. Follow these steps to recaulk your bathtub:
- Choose the right caulk for your project. Most caulk sealants are acrylic or latex-based; DAP KWIK SEAL ULTRA Premium Kitchen and Bath Siliconized Sealant is ideal for bathtubs. It bonds like a glue but seals like a caulk, ensuring your new bathtub sealant will be water-tight and it’s mildew resistant with a lifetime mould and mildew guarantee.
- Prepare your surface by making sure all the old caulk has been removed and that you’re working on a clean tub. Use painter’s tape as a guide to help you figure out exactly where you want the caulk — and where you don’t.
- Prepare your caulk by putting it into the gun and breaking the seal. Hold the caulking gun at a 45-degree angle and apply at one corner, working your way toward the center. Caulk from the opposite corner in, meeting your two lines in the middle. This will ensure both corners get a tight seal and it will be easier for you to maneuver.
- Smooth the caulk into a concave curve using a damp cloth and your finger. Remove the painter’s tape and clean the edges.
- Let it dry. DAP KWIK SEAL ULTRA dries tack-free in about 15 minutes and is water ready in four hours.
Home improvement doesn’t need to be tough. DAP carries all of the products you need for your next project, along with easy instructions to ensure your job looks like it was done by a seasoned professional.